Food + Drink
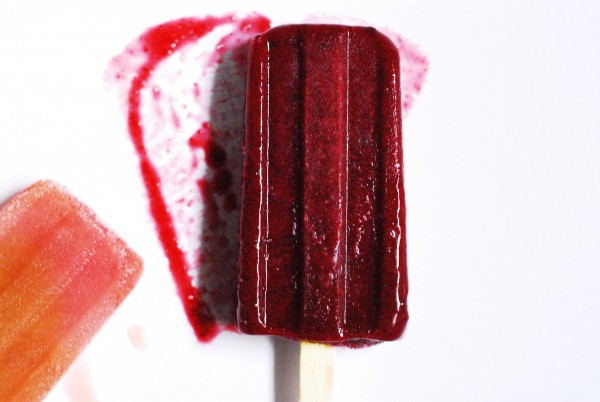
RECIPE: Black Cherry & Roasted Plum Pops
As much as I love making and eating ice cream, sometimes you just need a change of pace. When this happens, I turn to popsicles: from full fruit bombs to smooth creamy wonders, icy paletas to booze-infused "poptails," the range of styles and flavors is endless. The best part is that they're also incredibly easy to make on your own.
This was, in fact, my first attempt at popsicle-making. I had a little help from famed pop-maker La Newyorkina, who shared her tips, found here, and took general recipe guidelines from a featurette Bon Appetite recently did on paletas. But other than following those basic guidelines, I didn't have a set recipe in mind.
General rule of thumb is that using seasonal produce returns the best results. Cherries are kind of a big deal right now, and seeing that the plums were looking pretty good that day as well, I immediately put the two together in my mind. I wanted an herb in there, too, but since I don't much like chewing on leaves in my drinks, I figured I wouldn't like it in my popsicles either; infusing the simple syrup with mint seemed the way to go.
Roasting the plums brings out their natural sugars, so I cut back a bit on the added sugar, but remember: the mixture should be sweeter than you want the pops to be, as freezing dulls flavors slightly. Though that didn't really seem to be a problem with these!
Black Cherry & Roasted Plum Pops with Mint
Yield: approx. 10 standard size popsicles
Ingredients:
1 lb black cherries, pitted
1.5 lbs black plums (about 5-6 medium sized)
10 mint leaves
1 cup sugar
1 cup water
Instructions:
1. Halve the plums and remove the pits. Place the plums, cut side down, on a baking tray, and place in a preheated oven at 350°F. Roast plums for 25 minutes, until the flesh has burst and the fruit is very soft and the tray is running with juice.
2. While the plums are roasting, pour the sugar and the water together in a sauce pan set on a stovetop burner. Turn the heat to medium and stir the sugar to combine, bringing the mixture to a simmer. Turn off heat, remove from the burner and immediately add the mint leaves to the syrup to infuse with mint flavor. Allow to cool, then strain through a fine mesh seive into a measuring cup.
3. When everything has cooled down, combine the plums, cherries, and 3/4 cup minted simple syrup into a blender and purée the mixture until it is smooth, or desired texture (I like tiny pieces of fruit in mine). You can also use a hand-blender, but purée in parts, adding a few plum pieces, cherries, and 1/4 cup simple syrup at a time.
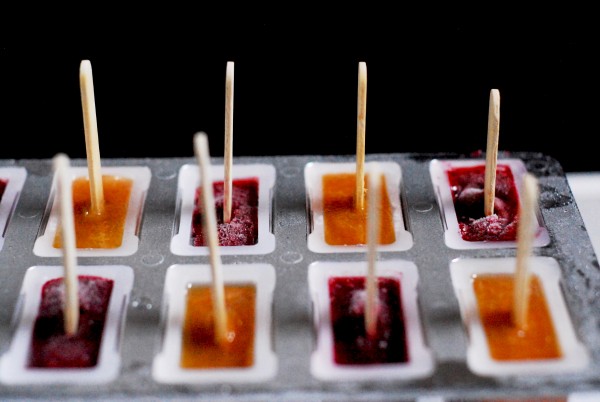
4. Depending on which type of molds you're using, fill and freeze accordingly:
If you're using the kind that gives each pop it's own plastic base and reusable sticks, simply fill and freeze for at least 6 hours.
If you're using the kind with replaceable pop sticks, as I did, fill the molds with purée, leaving 1/4 inch head space (this is important, as the mixture will expand when it freezes, and if you don't do this, you'll have a helluva time freeing those pops from the molds). Let the mixture freeze for about 2 hours, then insert the popsicle sticks. Return the pops to the freezer and freeze for at least another 4 hours.
5. When it comes time to unmold the pops, fill a large pot or basin with lukewarm water. Dunk the pops—without fully submerging—in the water for 15-20 seconds. The frozen pops should slide right out. Don't keep them in the mold for much longer than 24 hours, as they may become increasingly difficult to remove!